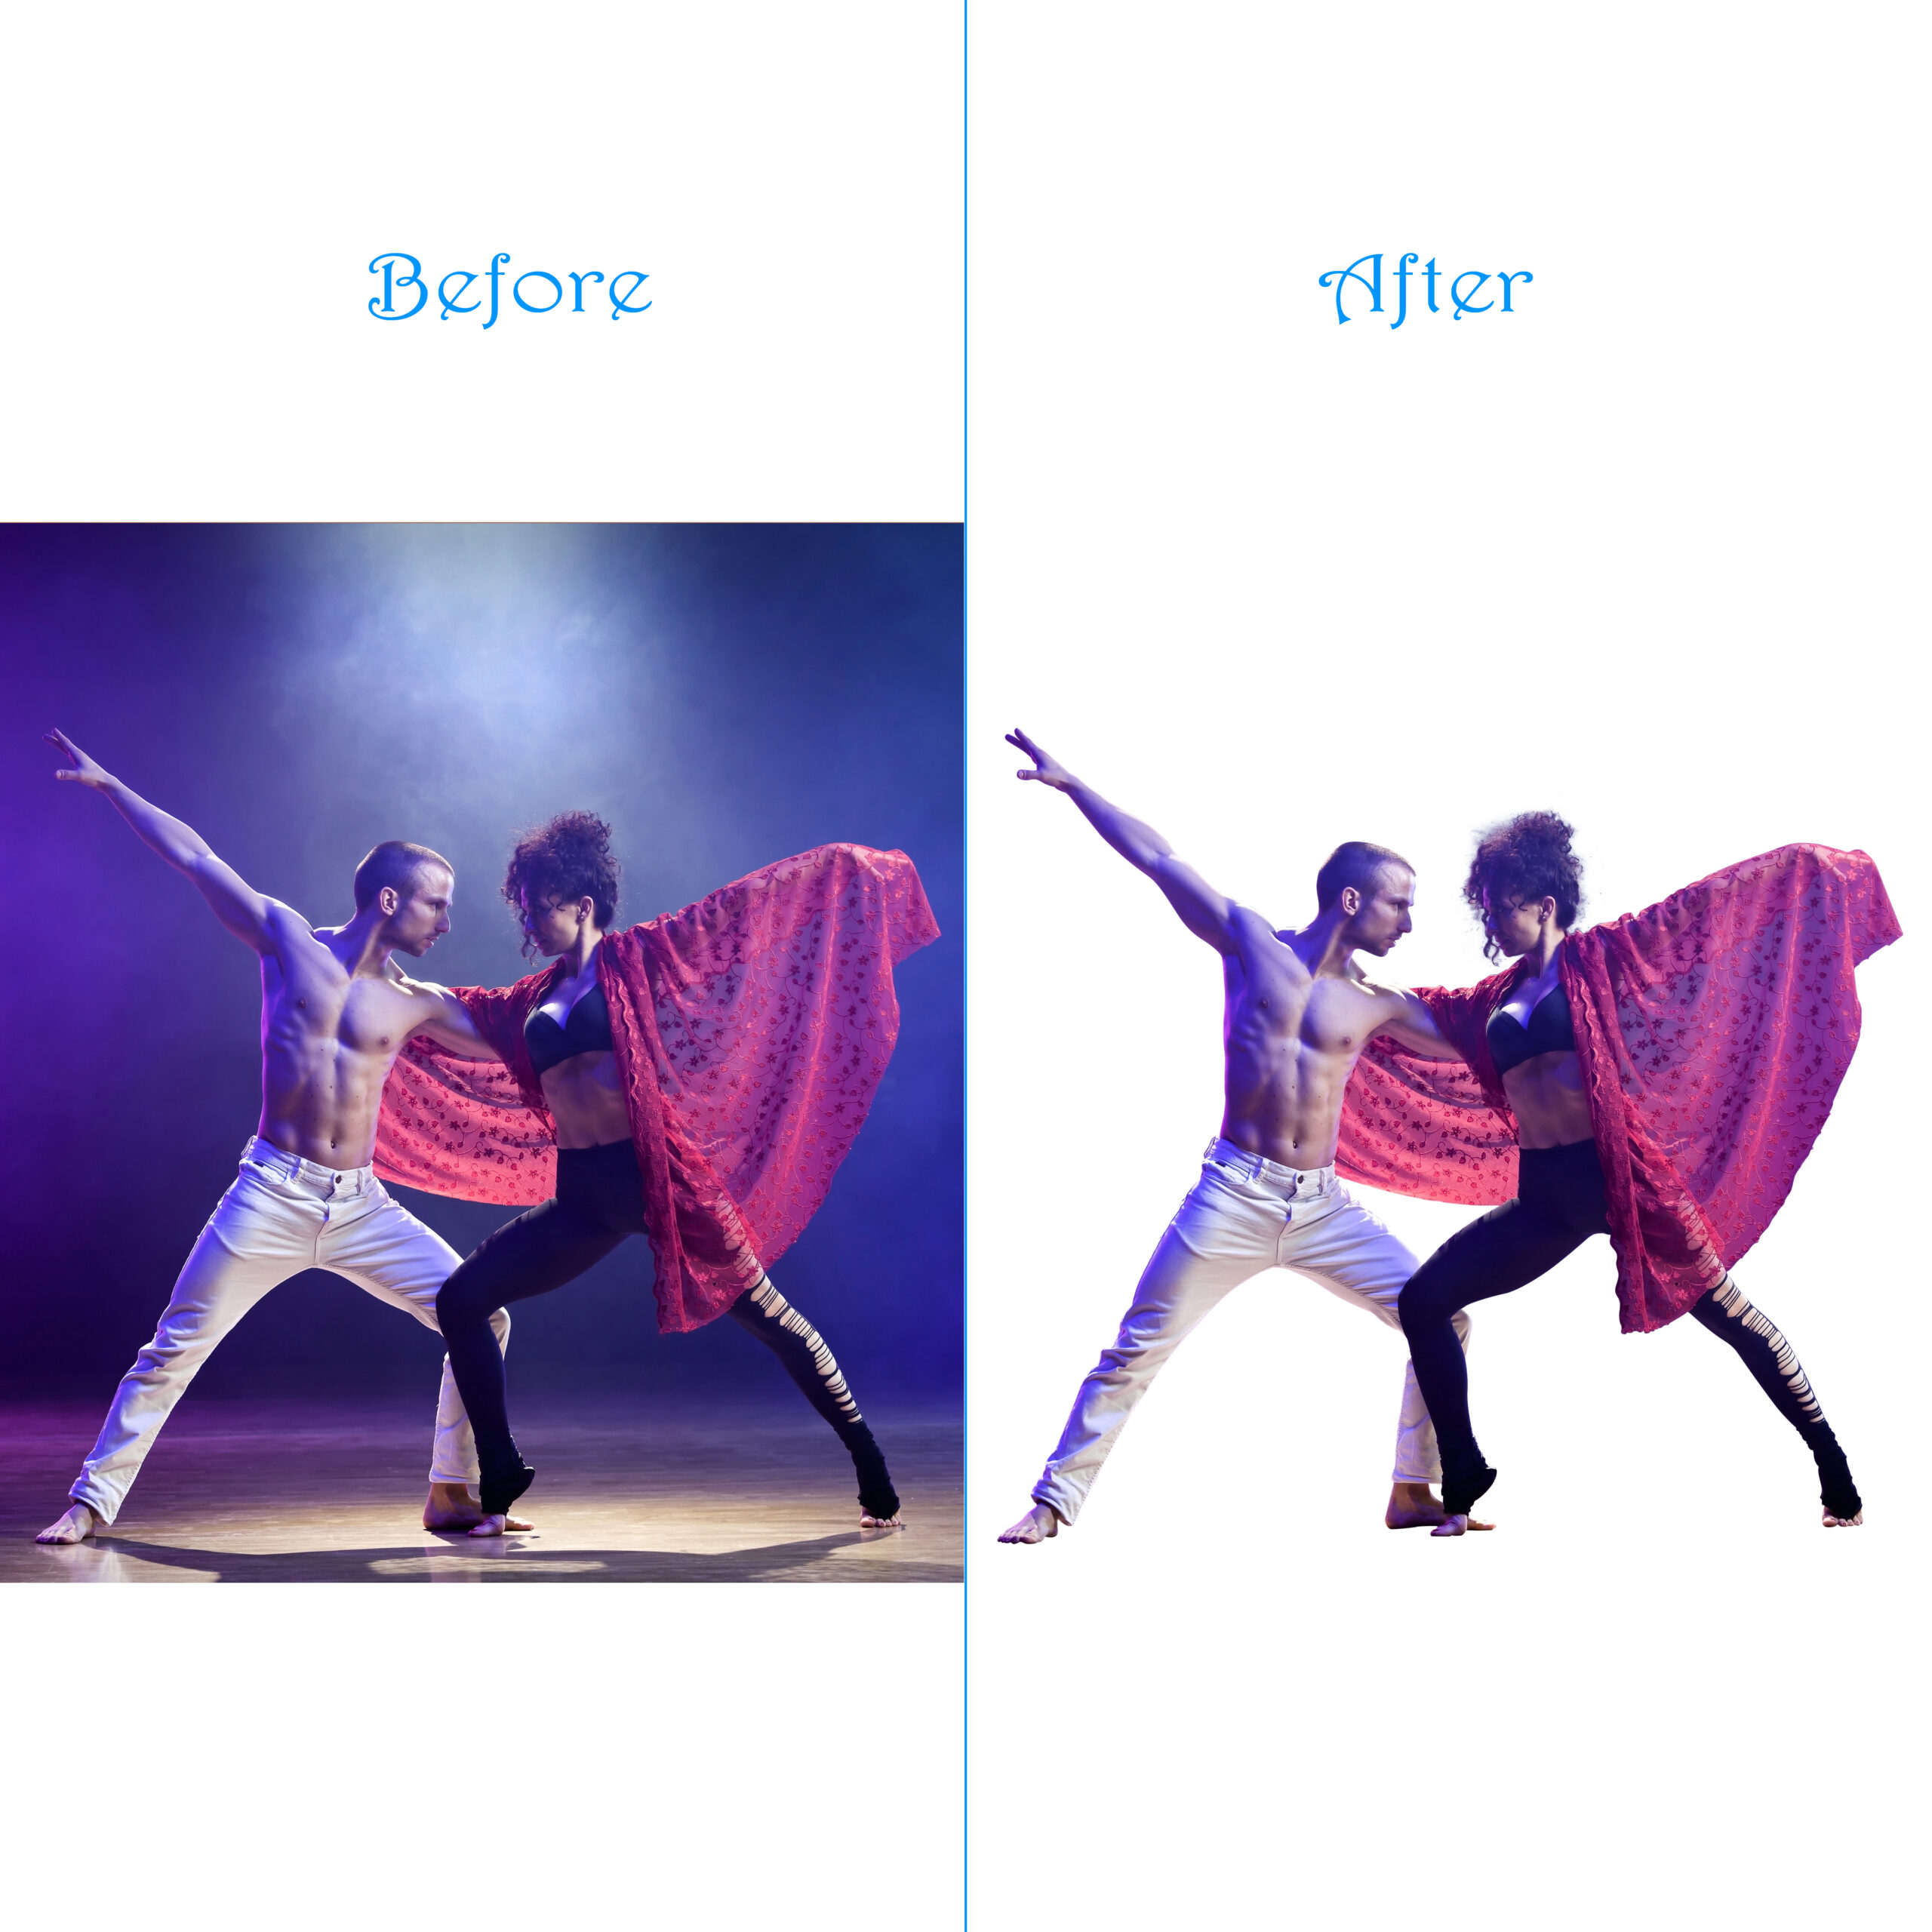
Want your online store to dazzle? Clipping paths are your secret weapon! They seamlessly isolate objects, making product photos clean and professional. E-commerce thrives on this technique, and Photoshop, both classic and CC, can help you achieve it.
This guide unlocks the world of How to make a clipping path in Photoshop. We’ll cover two methods tailored to each version, ensuring you can transform your product photos effortlessly. So, buckle up, and let’s dive in without delay!
Contents
How to Make a Clipping Path in Photoshop
Whether you’re using Photoshop or Photoshop CC, creating a clipping path follows the same basic steps: selecting the Pen Tool, outlining your subject, refining the path, and applying it. Let’s jump in!
Use Photoshop
There are several versions of Adobe Photoshop catering to different needs and user levels. While Photoshop Elements might be considered a more basic option, the standard version, often called Photoshop CC, offers a vast array of professional-grade editing features that are constantly updated. Whether you’re a beginner or a seasoned designer, choosing the right version depends on your specific goals and requirements.
Step 1. Open your Image
Launch Photoshop and open the image containing the object you want to create a clipping path around.
Step 2. Select the Pen Tool
From the left toolbar, choose the Pen Tool (P). This tool allows you to create a detailed, vector path
Step 3. Selecting Path
Select a new path for your picture clipping. Click “Window” > desired path option if not already visible
Step 4. Drawing Path
With the Pen Tool selected, carefully click points around the person’s outline to create a path that follows their edges. Zoom in for more precision and use anchor points and curves to capture their shape accurately.
Step 5. Drawing Clipping Path Around the Subject
Use the Pen Tool to meticulously trace the outline of your subject in the image, creating a precise clipping path to isolate it from the background.
Step 6. Make Selection
Select the file path by pressing Ctrl + Enter.
Step 7. Add Smoothness
Soften the edges of your subject by using a 0.5 feather. Go to Select > Modify > Feather or press Shift + F6.
Step 8. Make a Duplicate Layer Layer and Mask it
“To create a vibrant backdrop, duplicate the image background onto a new layer. Apply a mask to selectively reveal parts of the original background. Choose a bold color and add it as a separate layer, positioning it prominently in the center.
Now you have successfully made a clipping path for the photo.
With Use Photoshop CC
Upgrade your editing experience with Photoshop CC, a subscription-based software offering advanced tools and features for professional photo editing. Compared to older versions, it streamlines pro-level techniques like clipping paths, making them more accessible and efficient. While it does require a paid subscription, the enhanced capabilities might be worth the investment for serious photographers seeking powerful editing solutions.
Step 1. Open Image
Open the photo you want to edit. On Windows, press Ctrl+O. On Mac, press Cmd+O
Step 2. Choose Pen Tool and Use
Hit the P key or click the Pen Tool icon in the toolbox. Now, focus on your image. Click to set your starting point, then carefully trace the object you want to select. Remember, the key is to stay within the edges for a clean cut-out.
Need to carve out details within the object? No problem! Just keep tracing, and the Pen Tool will automatically create a new path inside the original one. Check the images below for a visual guide.
Step 3. Pick Exclude Overlapping Shape
In the selection submenu, find “Path Operation” and choose “Exclude Overlapping Shape”. This option is ideal for images with multiple lines, as it removes overlapping areas of the selected shapes.
Step 4. Create Clipping Path and Apply
Press and hold the Alt key while using the Pen Tool to trace a path around your subject. Once you’ve outlined the entire object, release the Alt key and click on the first anchor point (the starting point of your path) to close it.
Step 5. Save Path
You can also save the path by right-clicking it in the Paths panel and selecting “Save Path“.
Step 6. Remove Background
Let’s make your subject the star! Click “Mask” in the top menu to remove the background easily.
Step 7. Apply Layer Mask
With just two clicks, you can remove the background of your photo! Simply double-click the “Add Layer Mask” option and press Okay. Your subject will remain, while the background fades away. Now, choose your preferred file format (PSD, JPEG, TIFF) and save your image without the unwanted background.
Our Recent Blogs
10 + Ugly Shoes In The World 2024
Elevate Your Ecommerce Sales with Professional Drop Shadow Service
clipping path services compatible with e-commerce platforms like Shopify or WooCommerce
Why Clipping Path is Important?
Clipping paths are a fundamental tool in image editing, offering precise control over image elements. Here’s why they’re crucial:
-
Isolating Objects
- Clean Product Presentations:E-commerce thrives on clear product images. Clipping paths remove distracting backgrounds, highlighting products for better viewer focus and increased sales.
- Compositing & Layering:Combine elements from different images seamlessly. Isolate objects to create unique designs, mockups, or collages.
- Branding & Marketing:Place products into any scene, like a model’s hand or a lifestyle setting, enhancing brand storytelling and engagement.
-
Enhanced Image Quality
- Professional Touch:Clean, defined edges around objects elevate the professionalism and polish of your images.
- Background Flexibility:Change backgrounds easily, allowing for product showcasing on various platforms with diverse themes.
- Transparency Effects:Create natural-looking transparency for logos, watermarks, or layered elements, adding depth and visual interest.
-
Versatility Across Industries
- E-commerce:Essential for product photography, boosting sales and conversions.
- Graphic Design:Create effective marketing materials, brochures, and presentations.
- Photography:Enhance portraits, remove unwanted elements, or isolate specific details.
- Web Design:Design transparent buttons, icons, or interactive elements for websites.
-
Additional Benefits
- Reduced File Size: Removing unnecessary pixels can result in smaller file sizes, improving website loading speed and user experience.
- Flexibility for Editing: Allows further editing like color correction or adding shadows without affecting the background.
- Automation Potential: Automation tools can simplify clipping paths for high-volume image editing needs.
In essence, clipping paths unlock creative freedom and control over your images, ultimately improving their impact and effectiveness.
FAQ’s
How do I create a path in Photoshop?
- Choose from a variety of pre-built shapes like rectangles, circles, stars, and more. Click and drag to easily create basic geometries.
- Use the “Paths” option to convert these shapes into editable paths for further refinement.
- Perfect for quick geometric elements, logos, and repetitive patterns.
How do I turn a path into a selection in Photoshop?
Convert your path into a precise selection quickly. Simply press Ctrl + Enter (Windows) or Cmd + Return (Mac) and Photoshop will automatically create a selection based on the path boundaries. Remember, this applies to both open and closed paths.
How do you create multiple paths in Photoshop?
- Select your first path: In the Paths palette, click on the path you want to start with.
- Copy the path: Go to Edit > Copy (or press Ctrl/Cmd + C) to copy the selected path.
- Choose the destination path:Click on the path you want to merge the first path into in the Paths
- Paste the path: Go to Edit > Paste (or press Ctrl/Cmd + V) to paste the copied path into the selected one.
- Voila!Both paths are now combined into a single path.
- Repeat for all paths: Continue with steps 2-5 for each additional path you want to merge.
Final Words
Clipping Path service is getting more and more demands since the number of online product promotions is increasing. Customers show interest in items that look appealing. Through the path, it’s possible to make product images look more eye-catching.
It can be for commercial purposes or personal, but clipping paths will always be necessary. The importance of a path is huge, and so you must know how to create a clipping path in Photoshop. I hope this tutorial was a big help for you. We have more such Photoshop tutorials to learn how to remove shadows, double chins, etc. You should check them out too.

